Kamis, 17 November 2011

TUTORIAL ADOBE PHOTOSHOP

MEMBUAT EFEK GLOW

Step 1:

As with pretty much every tutorial I’ve ever written, we begin with a radial gradient. This one is pretty harsh and goes from a reddish brown color to black. Here are the exact color codes:
Foreground color – #922f00
Background color – #000000

Step 2:

In this tutorial, we actually need a pretty intense center, so what we’ll do is duplicate the layer we just made and set the one above to a blending mode of Color Dodge. There are a few types of blending modes, darkening ones, lightening ones, colorizing ones and inverting ones. Color Dodge is probably the strongest of the lightening ones. As you can see in the screenshot, it produces a pretty full-on center.

Step 3:

Now in our glow effect, it helps to have a nice textured background. So we are going to create a sort of smoky haze. To do this, create a new layer, then make sure you have white, #ffffff, and black, #000000, selected as your background and foreground colors.
Then go to Filter > Render > Clouds. This will give you the same random cloud pattern as above.

Step 4:

Now set the opacity of your layer to Overlay and 30% transparency. In some instances this would be enough, but for our needs we want it even smokier looking!
So go to Filter > Sketch > Chrome and use default settings of 4 and 7 for detail and smoothness respectively. Actually you can probably mess around with those if you want, but the defaults seem to be fine.
When you’re done, the result should look a lot smokier (once its overlayed at 30% transparency that is). You can see the result in the background of the next screenshot.

Step 5:

Now before we can start making glows, we need to have something to glow. Here’s where we break out the pen tool. If you have used the pen tool much I suggest playing around with it a little. There are some tricky things you can do with shortcuts, but for this tutorial you don’t need those.
In fact all we want to achieve are some nice curves. Fortunately this isn’t too hard. I find the trick is not to use too many points. Instead rely on the Pen Tool’s natural curving and drag the mouse out for each point so you get a big angle. In this S-curve shown above, I’ve only used three points, the starting point, the end point and one in between to give it the bend.


Step 6:

Once you have a nice curve, create a new layer. Then click on the Paintbrush Tool (B) and choose a very thin, hard brush. As you know, soft brushes are the blurry ones and hard brushes are more solid. In this case I suggest using a thickness of 3.
Note that you can have any color selected as your brush color because we’ll go over it with a layer style shortly.

Step 7:

Now switch back to the Pen Tool. You must switch tools in order to do this next bit.
Then right-click and select Stroke Path. A little dialog box will appear as in the screenshot. Choose Brush and make sure there is a tick next to Simulate Pressure. This is important as it will give your curve tapered ends which will make it rock!
Next right click again and select Delete Path.

Step 8:

You should now have something like the above. Just a thin, cool swishy thing.

Step 9:

Now we add some glows. The easiest way to make our glows is to use layer styles. And the best way to tell you what layer styles to use is to tell you to download the sample Photoshop PSD from the bottom of this page and then open it up and look through them there.
In a nutshell, I’ve added two sets of glows. To do this I first use Outer Glow and then because I want a second glow, I change the Drop Shadow settings so that it becomes a glow (you can do this by reducing the Distance and changing the blend mode to something like Color Dodge)

Oh and also I’ve used a Color Overlay to make the item white so that its like the center of an intense glow.

Step 10:

So now you have the same line but with a cool glow coming off it. The beauty of using a layer style is that you can copy and paste it to other layers. To do this you just right-click the layer and select Copy Layer Style then create a new layer and right-click and choose Paste Layer Style.


Step 11:

So now repeat the same process a couple of times to make more squiggly lines.
In this instance, I made one a little thicker by changing the paint brush size before I did the Stroke Path bit of the process. I also made a third line and erased part of it and sorta made it join the other two to look like a cool triangular shape.


Step 12:

Here I’ve added some text in and applied the same layer style to the text layers.
It’s important to pay lots of care and attention to your text. When you’re first starting out, use simple fonts and play with spacing between letters, words and sizes. You can achieve a lot with just some small tricks. Here I’ve contrasted the three words by making Glow a lot larger and in regular casing, then made Advanced and FX much smaller, with greater space between the letters and all caps.
You can control spacing with text using the Character window. If it isn’t already open go to Window > Character and it should appear. Mess about with the different settings until you learn what each controls.

Step 13:

Now we add some particles. To do this, create a new layer then select a tiny paint brush – size 3 – and just paint some dots on. It helps if they are clustered towards the center of the glow so that it looks like they are emanating from there.
You can make some of the central ones larger by doubling over on them with a second paint brush dab.
Then paste our Glow layer style on to that layer too!

Step 14:

Now that’s looking pretty cool, but it will look even cooler if we give it some subtle coloring instead of this super gaudy red.
So create a new layer, and using a radial gradient, draw a blue to white gradient as shown.

Step 15:

Then set that layer to a blending mode of Color and change the opacity to 50%.
You’ll see that it turns the image kind of bluish. I think that’s looking much cooler already, but just to go that extra step I also created a couple of extra layers, one with some faint yellow and one with faint purple. You can see them in the screenshot above.
I set each layer to blending mode of Color and thin opacities so that they all fade together.


Step 16:

And there you have it: advanced glow effects with a cool color blend and subtle smoky background combined make for a pretty great effect.
Just remember to experiment with settings and try applying the glow to different things to see how it turns out. And try different color combinations, some surprising combinations turn out really beautiful. Good luck!


selamat mencoba.....
^_^

Read more...

TUTORIAL ADOBE PHOTOSHOP

MEMBUAT ROBOT KATAK

in this tutorial, I'm going to show you some of the steps I took in making this


LANGKAH 1
There are a number of tricks and techniques people use when making an image of this nature, but I am going to show how I created this image using only the very basic tools. The same principles and process can be used on any animals, even humans, but I'm going to use a frog for my example because why not?
The first thing I did was gathered a few source images.

Finding a great subject source image to start with is one of the most important stages in the whole process. The reason I chose this particular image of a frog was that it was crisp, clean image with an interesting enough perspective, yet still be instantly recognizable as a frog even after we cover him in mechanical parts.
Now that we have our main subject and a few mechanical pieces ready, let's begin mechanicalizing him.
image


LANGKAH 2
I needed to extract the usable parts from my mechanical sources. Using the Lasso Tool, I roughly selected areas from my mechanical sources I figured I could use, and saved these parts into a new document for easy access later.

I tried to select segments of varying shapes, sizes, and texture in order to create a nice library of chrome and mechanical sources for our image


LANGKAH 3
The first thing I needed to do was to assemble the basic structure of the figure. Taking segments one by one, I started the assembly process of the actual robot figure. After pasting a segment of chrome onto our frog, we need to shape it. Using the Transform - Distort Tool, I transformed and skewed the segment in order to fit the contours of the frog's head. Making sure to always follow the curves and contours of the frog in order to help keep the familiar recognizable shape of the original frog.


LANGKAH 4
Now we need to cover more space using the same basic idea. By selecting basic segments from our chrome sources and free transforming them to fit the shape of our frog. Select segments of your mechanical parts that best resemble the area of the frog you're trying to cover. It may help you to start by applying the pieces furthest most from the camera first, then overlap pieces as you come closer and closer to the camera. At this point i'm not worried about covering the background or overlapping any of the original frog, as we can go back and add them in again later. For now I just want to lay down the basic structure of the figure.


LANGKAH 5
In order to create the mouth area, I needed to do something slightly different. I found a chrome pipe area on one of our chrome source pictures. I decided to use this segment for the mouth, as it was a nice long piece of chrome that I could transform into the shape of the mouth. I copied and pasted this segment onto our frog and Free Transformed it roughly in place until I was happy enough with the positioning of it. I also added this segment onto the head of our figure to create a median point on the figure.


LANGKAH 6
Next, all I had to do was fine tune and clean up the pieces to sit right on our figure. I did this simply by using the Smudge Tool set at 70-80% in strength, and about 7-10 pixels wide. Then I proceeded to smudge and smooth out the surfaces of the chrome pipe and mold them to fit the curves and contours of the frog's original mouth.


LANGKAH 7
When I'm satisfied with the positioning of all the mechanical pieces, the next step was to apply some highlights and shadows to separate the segments a little better. I started with the shadows. Using the Brush Tool set at 100% opacity, I painted in the black shadows on a new layer directly underneath each chrome segment layer. Next, I took the Smudge Tool set at 60-70% pressure and smoothed out the shadows. Following the contours of the underlying pieces, I shaped the shadows. The shadows should give our figure more depth and help to isolate each segment a little better

LANGKAH 8
Next, in order to further accentuate the shadows, we're going to add some simple highlights. Again by using the Brush Tool (this time set to white) set at 100% opacity, I painted in some basic highlights on the edges and areas I figured could use a little further bump in contrast on a new layer directly above each piece of our chrome layers.

Then just like the shadows, I then took the Smudge Tool set at 60-70% pressure to smooth and shape out our highlights to fit the curves of our figure.

LANGKAH 9
You may still notice some remnants of the original frog showing on the edges of the figure. This can be easily cleaned up with a little work using the Clone Tool. At this point, it'll be a good idea to hide all our layers except for our background layer. Create a new layer directly above your original frog image. With the Clone Tool selected, make sure you have the "select all layers" box selected. Hold the "alt" key and select an arbitrary area of the background to copy. Then it's all a matter of cloning the background in.


LANGKAH 10
In order to make the image look even more interesting, I decided to create the illusion of the frog's skin being pulled away to reveal the robot. On a new layer above our background, I roughly painted the insides of the opened skin. Using the Brush Tool set at 100% opacity set to a brown, skin-toned color, I mapped out the area our skin would cover


LANGKAH 11
Next, I wanted to give the skin some shadow. Selecting a darker shade of our original skin color, I roughly painted in the shadows. Then, using the Smudge Tool set at 60-70% pressure, I smoothed out the shadows just (as in Step 07) until I was happy with the general placement and shape of the skin


LANGKAH 12
I then wanted to add some of the original skin from the frog to form the outside of the skin as well. I opened the original frog image in a new File for easy access. Using the Lasso Tool, I selected edges of the frog's original skin to copy. I copied this selection and pasted it on to our robofrog document. Using the Transfrom-Distort Tool, I transformed the skin to follow the direction of the skin "pull". And like we did in our earlier steps, I proceeded to add slight shadows and highlights to the skin to further accentuate the "pull" effect.


LANGKAH 13
For the skin flaps on the arms, I did something different. First I selected the original arm and copied it onto a new layer. Then using the Smudge Tool set at 80-90% pressure, I smudged and drew in the direction of the skin and folds of the skin. Then, using darker and lighter shades from the original skin, I drew and smudged in shadows and highlights again as in the previous steps


LANGKAH 14

When I was happy with the look of the skin, the next step was to go back and return some of the orginal rough skin texture from the original skin. I did this by copying an area of the original frog skin and pasting it on a new layer directly on top of our Arm Skin layer.

I then set this layer with the "overlay" Blend mode. This gives our skin the rough texture. I then erased the edges of the overlay skin layer so as it covers only the necessary areas


LANGKAH 15
Next, I wanted to make the chrome look even more like chrome. By adding reflections from surrounding elements, I hope to add some more realism to the chrome. I did this by copying layers of surrounding elements and forming them to create an illusion of reflection.

For example, as in the image above, I started by Duplicating the layer with the metal valve. I then set the opacity of this layer to 50% then using the Transform-Distort Tool, I shaped and formed the element to fit onto the shoulder chrome segment. I used this same method for other surrounding areas like the leaf and areas where the skin overlaps a chrome segment.


LANGKAH 16
Finally, I needed something to hold up the frog's skin. I decided to use a couple of dragonflies for this effect. After finding a good image of a dragonfly, it was then all a matter of extracting him from the original file and pasting him onto a new layer in our working document.

I added the Motion Blue filter to the winged areas of the dragonflies to simulate motion.


TARAMMM


And voila! Our image is complete! A robotic frog created using only the very basic tools of photoshop!

SEMOGA BERMANFAAT
^_^

Read more...

Rabu, 19 Oktober 2011

ALESANA


Kira-kira sekitar awal tahun 2007-an, saya ga sengaja di kasih video klip Alesana yang judulnya Ambrosia. Padahal sebelumnya saya belum pernah dengar nama band atau lagunya dari band yang satu ini. Pertama kali liat video klipnya saya terheran sekali, awalnya dikira musik pop / kalem. Setting tempat nya aja di taman dan dengan hiasan bunga-bunga yang ada disekitar itu. Tapi ternyata teriakannya ngagetin orang sekampung (kalau distel high volume) haha. Ga nyangka, dengan aliran musik kayak gitu ternyata sekarang penggemar Alesana makin banyak aja, termasuk Indonesia.

Genre / aliran asli alesana sendiri adalah post-hardcore, namun banyak yang menyebutkan bahwa Alesana sebagai icon musik emo dengan sudut pandang yang berbeda-beda. Tapi yang jelas mereka menciptakan lirik lagu yang dalam.

Kalau kalian perhatiin, mereka mempunyai khas dan keunikan tersendiri dalam bermusik terutama kombinasi vokal. Suara kalem yang bermelodi seperti kebanyakan alternative music, dipadukan dengan teriakan nyaring. Serta ada juga growl / teriakan seperti yang sering kita dengar di musik hardcore.

Alesana (sebenarnya di ambil dari kata alice-anna) band yang beraliran post-hardcore yang berasal dari Raleigh, North Carolina, USA pastinya. Berdiri sejak tahun 2004. Karya yang udah mereka buat satu EP, 7 compilations, dan 2 full album, dan satu cd produced tour.

Profil / nama anggota band :
* Dennis “Denny Diablo” Lee – Screaming vocals (2004-present)
* Shawn Milke – Vocals, Guitar, Piano (2004-present)
* Patrick “Peezee” Thompson – Lead guitar, Backing vocals during live performance (2004-present)
* Jeremy “Jables” Bryan – Drums (2005-present)
* Shane Crump – Bass guitar, Vocals (2007-present)
* Jake Campbell – Rhythm guitar (2008-present)

Read more...

Rabu, 06 Januari 2010

The Rev A7X Meninggal


Berdasarkan beberapa laporan beberapa situs berita amerika, drummer Avenged Sevenfold, James Owen Sullivan atau sering kita panggil The Rev dinyatakan meninggal kemarin tanggal 28 Desember 2009 di rumahnya. Penyebab kematiannya belum begitu jelas karena saat berita ini dirilis masih terjadi kesimpang siuran berita.

Hal tersebut sangat menyentak seluruh anggota Avenged Sevenfold lainnya karena saat ini masih dalam proses pembuatan album baru seperti dalam pernyataan mereka di situs resmi Avenged Sevenfold. Bagi para pengemar Avenged Sevenfold ini juga merupakan suatu pukulan yang sangat telak.

It is with great sadness and heavy hearts that we tell you of the passing today of Jimmy “The Rev” Sullivan. Jimmy was not only one of the world’s best drummers, but more importantly he was our best friend and brother. Our thoughts and prayers go out to Jimmy’s family and we hope that you will respect their privacy during this difficult time.

Jimmy you are forever in our hearts.

We love you.

M Shadows, Synyster Gates, Zacky Vengeance and Johnny Christ

Kalaupun berita ini memang benar adanya, semoga The Rev tenang di alam sana dan yang jelas bakal sulit tergantikan.


Bagi Yang Belum Mengenal The Rev , silahkan lihat profilnya dibawah ini

James Owen Sullivan, (lahir 9 Februari 1981, umur 28 tahun, lebih dikenal dengan nama The Rev atau The Reverend Tholomew Plague) adalah seorang drummer sekaligus backing vocal Avenged Sevenfold. The Rev juga sempat menjadi penyanyi utama pada grup musik Pinkly Smooth.

The Rev adalah anak tunggal. Pada masa kecilnya, dia seringkali dikeluarkan dari sekolah. The Rev juga sudah tujuh kali masuk penjara karena kejadian-kejadian seperti berkelahi di dalam bar.

The Rev
Latar belakang
Nama lahir James Owen Sullivan
Nama lain The Reverend Tholomew Plague, Rat Head, The Rev, Mr. Plague, Jimmy
Lahir 9 Februari 1981 (umur 28)
Genre Metalcore, Hard Rock, Heavy Metal,Third Wave Ska, Avant-Garde Metal, Hardcore Punk
Pekerjaan Musician, Songwriter, Drummer, Percussionist
Instrumen Drums,Guitar, Bass, Piano, Vocals
Tahun aktif 1999–Sekarang
Perusahaan rekaman Warner Bros. Records, Good Life Recordings, Hopeless Records, Bucktan Records
Terkait dengan Avenged Sevenfold

Pinkly Smooth

Suburban Legends, Ballistico

Read more...

Senin, 02 November 2009

hewan yg hidup terlama..!


Hewan apakah yang bisa bertahan hidup paling lama saat ini? Jawabannya adalah kerang quahog dari perairan Islandia yang masih hidup hingga 2007 lalu. Moluska kecil ini jika berulangtahun akan memiliki 400 lilin di atas kuenya. Sebenarnya rata-rata usia klan qualhog ini tidak hidup selama itu.

Biasanya saat bicara tentang hewan apa yang hidup paling lama dan paling sebentar, ilmuwan akan mereferensikan rata-rata usianya. Usia rata-rata paling panjang masih dipegang oleh kura-kura Galapagos dengan usia 150 tahun.
Berikut adalah mahluk hidup yang usianya tergolong panjang:
Kura-kura boks Amerika , 120 tahun
Ikan paus kepala bungkuk , 60-70 tahun (pernah ada yang sampai 200 tahun).
Gajah, 70 tahun
Manusia, 70-80 tahun.
Sedangkan hewan yang berusia pendek adalah:
Lalat rumah dewasa, 4 minggu
Tawon pekerja, 5 minggu
Semut pekerja, 6 bulan
Oposum, 1 tahun
Ratu semut, 3 tahun
Tikus, 2-3 tahun
Diterjemahkan secara bebas dari www.livescience.com
Kredit foto: www.janeresture.com/galapagos/turtle1.jpg

Read more...

Sabtu, 24 Oktober 2009

CARA MENYETEL GITAR


Putar tuner(penala) senar gitar perlahan, petiklah beberapa kali(dengan tangan satunya), bandingkan dengan senar lain hingga sama nadanya, dengan ketentuan seperti berikut:

  1. Nada Senar no 1(E) los senar = Nada senar no 2(B) fret ke 5 (petik senar kedua dengan jari tangan satunya menekan senar no 2 pada fret ke 5)
  1. Nada Senar no 2(B) los senar = Nada senar no 3 fret ke 4 (petik senar ketiga dengan jari tangan satunya menekan senar no 3 pada fret ke 4)
  1. Nada Senar no 3(G) los senar = Nada senar no 4 fret ke 5 (petik senar keempat dengan jari tangan satunya menekan senar no 4 pada fret ke 5)
  1. Nada Senar no 4(D) los senar = Nada senar no 5 fret ke 5 (petik senar kelima dengan jari tangan satunya menekan senar no 5 pada fret ke 5)
  1. Nada Senar no 5(A) los senar = Nada senar no 6 fret ke 5 (petik senar keenam dengan jari tangan satunya menekan senar no 6 pada fret ke 5)

Los senar adalah senar gitar hanya dipetik saja, tanpa jari kita menekan pada fretboard

Untuk aturan frekuensi nada musik baik vokal maupun instrument musik sebenarnya sudah mengikuti standar yang berlaku secara internasional Adapun nada yang dijadikan standar internasional adalah nada A dengan frekuensi 440Hz(hertz), sehingga alat musik modern(tradisional seperti gamelan misalnya tidak mengikuti standar tsb) dimanapun di dunia akan mengikuti standar tersebut. Nah pertanyaannya adalah: bagaimana kita tahu kalo nada A pada gitar ketika sudah kita stem = 440Hz? . Kita perlu menggunakan alat ukur nada yang standar, yaitu:

  1. bisa menggunakan sebuah garpu tala (bisa dibeli di toko musik), cara memakainya cukup pukulkan garpu tala ke obyek tertentu(meja misalnya) maka akan berbunyi sesuai dengan nada tertentu, tiap garpu tala punya nada tertentu, biasanya C atau A(bawaan pabrik)
  2. dengan menggunakan digital guitar tuner (bisa dibeli di toko musik juga), cara memakainya, biasanya ada semacam buku panduan yang disertakan ketika kita membelinya.
  3. menggunakan alat musik lain sebagai perbandingan, bisa dengan piano/keyboard misalnya. Sebagai contoh, misalnya dengan piano, bisa dibaca pada http://budisapt.blogspot.com/2008/12/menstem-gitar-dengan-cara-membandingkan.html
  4. dengan software musik di komputer, seperti guitarpro yang sudah menyertakan digital guitar tuner didalamnya
  5. beberapa efek gitar elektrik juga sudah menyertakan digital guitar tuner didalamnya

Read more...

Kamis, 01 Oktober 2009

Kecepatan Cahaya


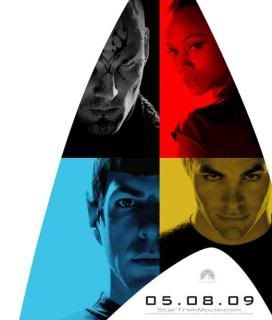
Bersama dengan diluncurkannya film layar lebar Star Trek di bioskop-bioskop, salah satu daya tarik yang ingin dilihat para pecinta film petualangan luar angkasa ini adalah kapal Starship Enterprise terbang melintasi galaxy dengan kecepatan cahaya. Tapi, apakah terbang dengan kecepatan ‘warp’ bisa menjadi kenyataan?

Dua orang Fisikawan asal Universitas Baylor punya ide untuk merealisasikan terbang pada kecepatan cahaya menjadi kenyataan, dan ide mereka tersebut tidak melanggar hukum fisika apapun.

Dr. Gerald Cleaver, seorang Profesor Fisika di Universitas Baylor, bersama dengan Dr. Richard Obousy, seorang mahasiswa pos-doktoral, berteori bahwa dengan memanipulasi dimensi-dimensi ruang dan waktu disekitar pesawat dengan jumlah energi yang sangat besar akan menciptakan sebuah ‘bubble’ yang bisa mendorong pesawat lebih cepat dari kecepatan cahaya. Untuk menciptakan bubble ini, para Fisikawan Universitas Baylor percaya dengan memanipulasi ke-11 dimensi akan menciptakan energi gelap. Cleaver mengatakan energi gelap yang positif bertanggung jawab dalam mempercepat laju alam semesta seiring waktu berjalan, sama seperti yang terjadi setelah Big Bang, pada saat alam semesta meluas lebih cepat dari kecepatan cahaya.

“Bayangkan seperti seorang peselancar diatas ombak,” Cleaver mengatakan, yang mendampingi Obousy tentang metode baru ini. “Pesawat tersebut akan didorong oleh bubble dan bubble akan terbang lebih cepat dari kecepatan cahaya.

Metode yang dikembangkan berdasar pada gerak Alcubierre, yang bertujuan memperluas materi-materi luar angkasa yang berada dibelakang pesawat menjadi bubble dan menyiutkan ruang dan waktu di depan pesawat. Sebenarnya pesawat tidak bergerak, tapi pesawat akan berada diantara perluasan dan penyiutan dimensi-dimensi ruang dan waktu. Karena angkasa akan bergerak disekitar pesawat, teori tersebut tidak akan melanggar hukum Relativitas Einstein.

Beberapa teori mengatakan bahwa alam semesta terbentuk dari berbagai dimensi. Tinggi, lebar dan panjang adalah tiga dimensi, dan waktu adalah dimensi ke-4. Para ilmuwan percaya bahwa ada 10 dimensi, dengan 6 dimensi lainnya belum bisa diidentifikasi. Sebuah teori baru, yang disebut M-theory, mambawa teori-teori lainnya satu langkah lebih maju dan bisa memunculkan dimensi luar angkasa ke-11. Merupakan dimensi ke-11 yang diteliti di Universitas Baylor yang dipercaya bisa membuat pesawat melaju lebih cepat dari kecepatan cahaya.

Para fisikawan Universitas Baylor memperkirakan jumlah energi yang dibutuhkan untuk menghasilkan sebuah dimensi ekstra sama dengan jumlah seluruh massa planet Jupiter yang dikonversikan menjadi energi.

“Itu merupakan jumlah energi yang sangat besar,” kata Cleaver. “Posisi kita masih jauh untuk menciptakan tipe energi tersebut”.
Diterjemahkan secara bebas dari http://www.sciencedaily.com.

Read more...

My Music

Followers

Text

  ©Template by Dicas Blogger.